Hi everyone, I have a fun tutorial for a Color Block pouch for you today.
Ready? Here we go.

Finished size: 8" wide x 4.5" tall
Notes:
- use 1/4" seam allowance unless otherwise noted
- light
to mid- weight quilting fabric is recommended for both exterior and
lining
- make sure your printer is set
to “actual size” when printing your template (page scaling is set to “none”). Do not select “shrink to
fit” as that would result in your
template being printed incorrectly.
Your will need:
A,B, and C templates (click here)
three different fabrics for front exterior panel: about 9" x 6" each
fabric for back exterior panel + zipper tab: 10" x 6"
lining fabric: 9" x 12"
medium weight fusible interfacing (I used SF101): 18" square
2" long ribbon for tab
7" long metal or nylon zipper
zipper pull (optional)
zipper foot for your sewing machine
1. Cutting
front exterior panel fabrics cut: three panels using provided templates A, B, and C
back exterior panel fabric cut: one 8.5" wide x 5" tall rectangle for back panel
one 1.25" x 2" rectangle for zipper tab
lining fabric cut: two 8.5" wide x 5" tall lining panels
interfacing cut: four 8.5" wide x 5" tall rectangles
2. Front exterior panel
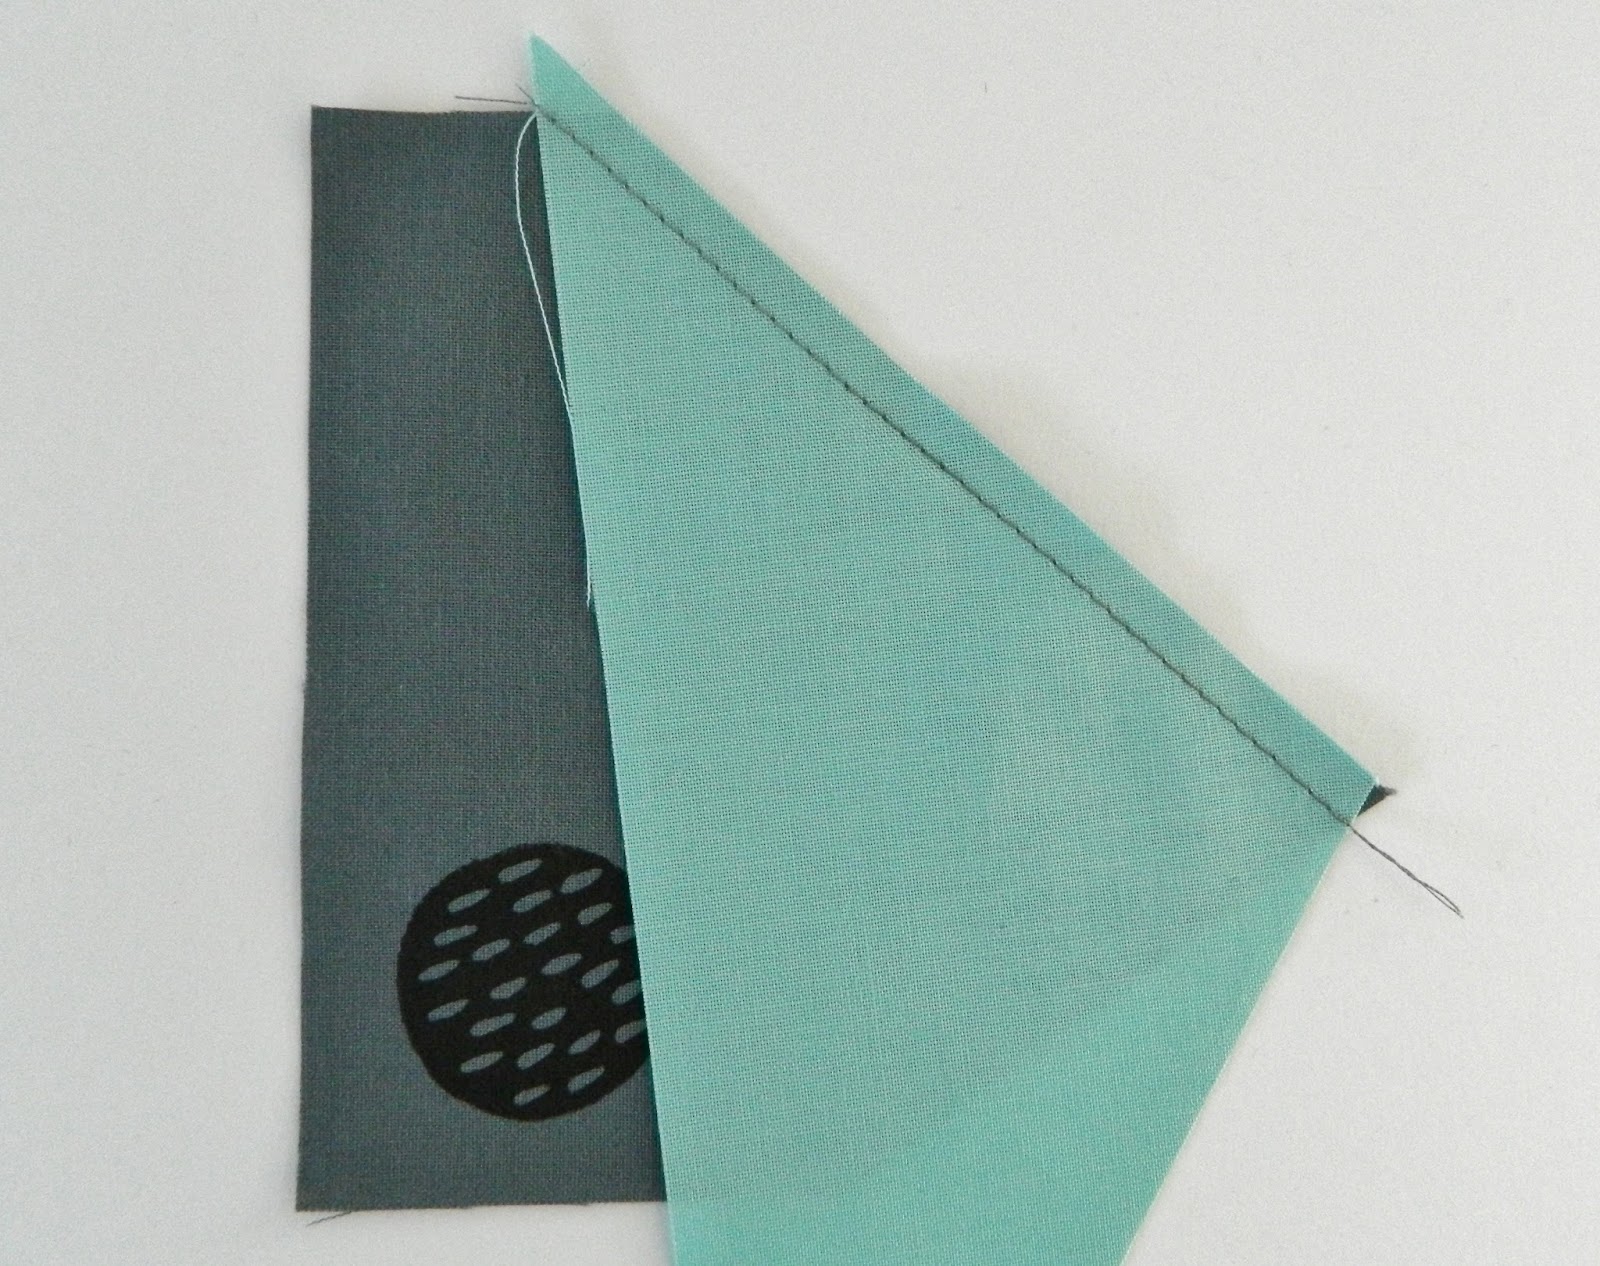
a) Assemble front exterior panel by first stitching panels B and C together (use template markings to ensure you're joining correct edges). Press the seam open.
b) Attach panel A to assembled B+ C panels. Press the seam open. If needed, trim your front exterior panel to 8.5" wide x 5" tall.
3. Interfacing
Adhere fusible interfacing to wrong sides of both front and back exterior panels as well as both lining panels.
4. Zipper
a) Press zipper tab in half, wrong sides together (bring 1.25" sides together), open the tab and press raw ends towards the center. Fold in half again, raw edges are hidden inside, press (your zipper tab will now measure 0.5" x 1.25").
b) Trim zipper tape on closed end of zipper to measure 0.5". Place zipper tape inside the tab (zipper tape edge is touching middle fold of tab). Pin tab to zipper tape and sew in place using 1/8" seam allowance, making sure to avoid metal zipper end.
c) Bend zipper tape on open end of zipper at 45 degree angle towards wrong side of zipper tape. Baste within seam allowance either by hand or by machine to secure in place. Trim off extra zipper tape.


5. Assembly
a) Center zipper right side down (zipper pull is on the left side) along the top raw edge of front exterior panel. Align zipper tape with the edge, pin to hold in place. Baste using 1/8" seam allowance taking the pins out as you go.

b) Place lining right side up on a flat surface. Place exterior with basted zipper right side down on top. Align all the edges and pin along the top edge (zipper is sandwiched in between the two layers). Stitch along the top pinned edge taking the pins out as you go. Use the edge of your zipper foot as a guide to make sure your stitching is as straight as possible.

c) Press exterior panel away from zipper. Topstitch along exterior seam using 1/8" seam allowance.

d) Fold ribbon in half, baste it to front exterior's right edge about 1" from top seam.
e) Now flip lining away from zipper as well, lining and exterior panels are wrong sides together. Press.
f) Place second exterior panel right side down on a flat surface. Put the zipper + front exterior and lining from previous step on top- right sides together. Align top raw edge of exterior with zipper tape. Pin and bast along the top edge using 1/8" seam allowance.
g) Place second lining right side up on a flat surface. Put the pouch from previous step lining side down. Align top raw edges, pin, and stitch along the top edge.

h) Press back exterior panel away from zipper and topstitch using 1/8" seam allowance. Flip lining away from zipper, lining and back exterior panel are wrong sides together. Press.
i) Open zipper about half way, align exterior panels on top of each other and lining on top of each other as well. Pin/ clip all the way around. Sew all the way around the edges making sure to leave about 4" opening in the lining's bottom seam for turning. Press the seam open and clip corners.

j) Turn the pouch right side out through the opening in the lining. Stitch the lining closed. Push lining gently into the pouch, give it one final press, remove all the stray thread, add a zipper pull if you wish, and you're finished.


Congratulations!!! I hope you enjoyed this tutorial.
And, as always, if you make a project using any of my tutorials please add it to my Flickr group. I love seeing all your amazing creations.
Svetlana